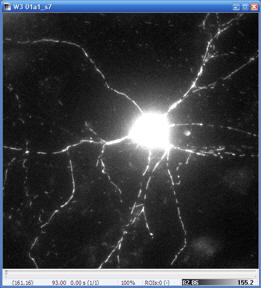
Image window contains a time lapse of frames. Each pixel
is stored as a 32bit floating point number, thus has a numeric value
between ±3.4
´10
38
or as little as 1.2
´10
-38.
Pixels may have no numeric values, these pixels are considered as
masked. Actually, masking happens by setting pixels to non-numeric
values, e.g. by division by zero, using division by a binarized
image.
The Image Window scales floating point data to grayscale intensities
or a palette of colors (look up table, LUT), as indicated by the
Intensity scale bar. Importantly
, intensity scaling
and the LUT are only for visualization, and
the actual image data in the memory is not affected by the intensity scaling.
Therefore a distinction has to be made between the grayscale or RGB
image seen in the Image Window, and the complete 32bit data set in
the memory. All image processing functions and plot generation
operate on the data stored in the memory, except for the
 Write
Back Scaled Values
Write
Back Scaled Values function, which stores the visualized images
as image data in the memory. When an image window is copied to the
clipboard

or exported
to file

,
the visualized image in RGB format is outputted. When an image
window is duplicated

,
the complete 32bit data set is duplicated.
To set the look up table (LUT) or the intensity scaling use right click on
the image window and the
LUT and
Scaling menu
points. Alternatively drag the sides of the scale bar in the
bottom of the
Image Window The gamma value can be set in
the LUT menu or by shift-left click and dragging the middle of the
Intensity scale bar.
To draw ROIs use the following
toolbar buttons: point ROI:

line ROI:

area ROI:

magic wand tool:

.
Set parameters of the magic wand tool in the Edit/Preferences
dialog.
To select and move ROIs use

in the
toolbar.
Use the Ctrl key to toggle between drawing or moving ROIs.
To erase selected ROI use DEL, the context menu of the
Image Window or

in the
toolbar. ROIs can be also deleted by the selecting and
deleting a trace using the DEL key in a Plot Window.
ROIs cannot be modified, just repositioned one finished
drawing.
ROIs are shared between linked
Image Windows.

Time line: |
 |
|
|
use scroll or drag mouse to move. Use left and
right arrows on keyboard for on frame steps |
(x,y) position of pointer
pixel value under the pointer
position on the timescale in s
and in (frame/total frames)
ROIs: number of ROIs, and the
active ROI in brackets. |
Intensity scale
bar
Click on minimum or maximum values ad drag them
horizontally with the left mouse button down to
scale
Drag the middle to scale both values
Shift-left click and drag the middle to set
gamma value |
Use
the

button
in the toolbar to play image sequence. Set the frame rate in
the Edit/Preferences dialog.
Use the

button in the toolbar to synchronize the frame number shown
in all linked image windows.
Double-click the status bar for image properties.
The context menu (right click
menu) of the Image Window
The following functions are available in the context menu of the
image window, and some of them also as
image processing functions in the main menu:
-
 Process
this... :if a single operand
function
is selected, the content of the Image Window is processed. For
multiple operand functions a check mark appears here whether to
include the Image Window as operand.
Process
this... :if a single operand
function
is selected, the content of the Image Window is processed. For
multiple operand functions a check mark appears here whether to
include the Image Window as operand.
- Zoom (alternatively use resizing the window to zoom, or the
scroller of the mouse or double click when the
 ROI tool is selected in the main toolbar.)
- Look Up Table (LUT) selection (see also Playback/Set
Scaling/LUT)
- Set scaling (see also Playback/Set
Scaling/LUT)
- Attach overlay, intensity modulated display (IMD), and
annotation (see also Playback/Attach...
functions)
- Invoke image information: this text window contains metadata
that was recorded by the image acquisition software
- ROI and clipboard functions (see also in the toolbar and in
the Edit Menu)